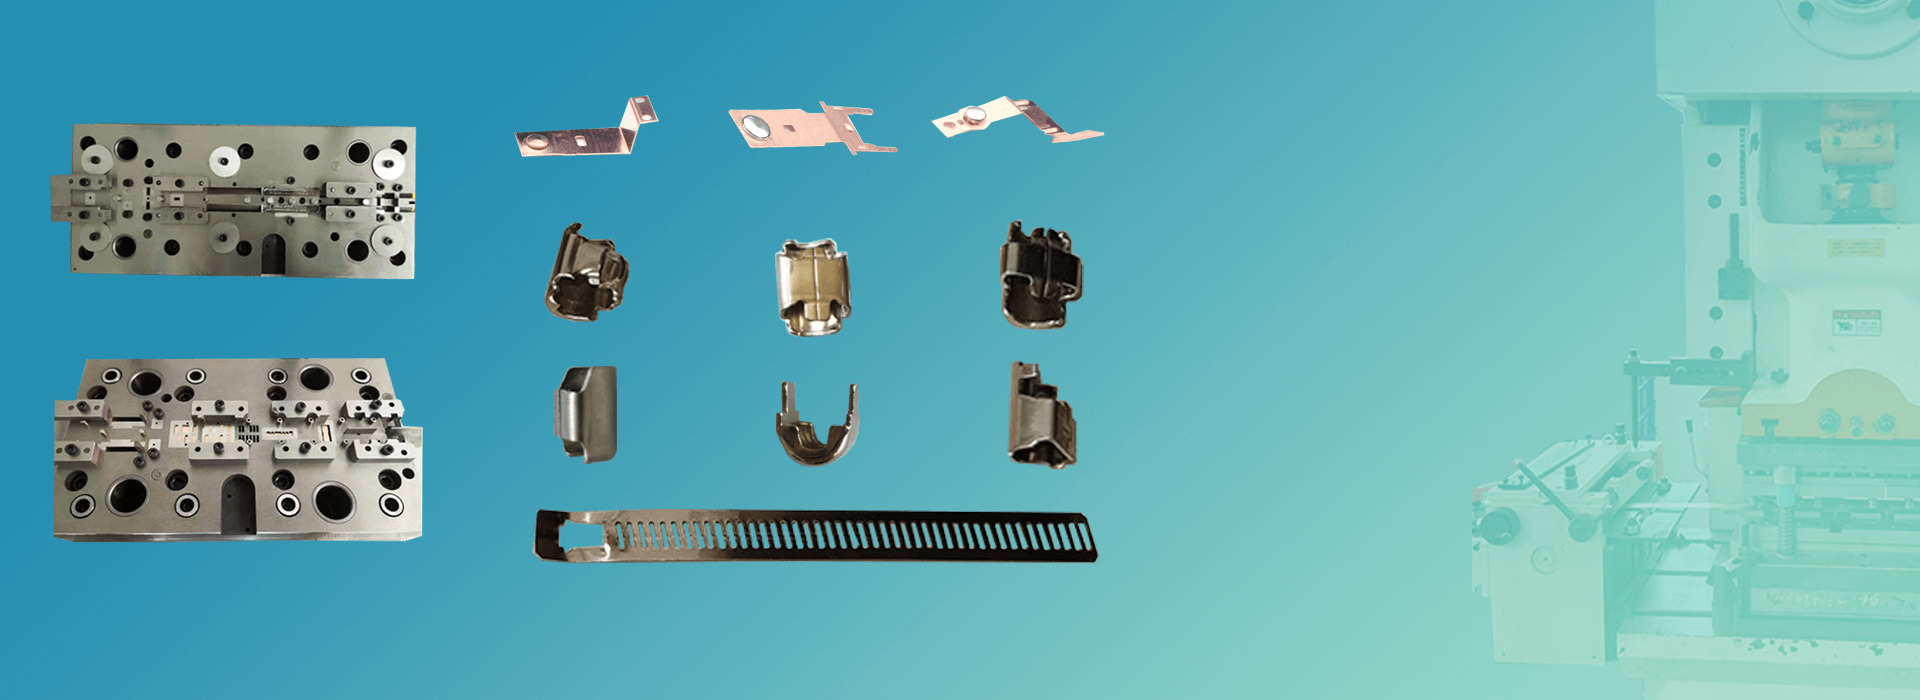
Automatic Assembly Machine
News
  • How to properly install and remove the pre-opening spring clamp?
    2025 - 09 - 17 How to properly install and remove the pre-opening spring clamp?
    The steps to install the pre-opening spring clamp are as follows:   1. ** Preparation ** : Select the appropriate size and type of pre-opening spring clamp, and ensure that its surface is smooth and non-damaging. In addition, prepare required tools, such as screwdrivers and wrenches.   2. ** Clean the installation part ** : Clean the part where the clamp needs to be installed and ensure that the surface is free of oil, dust and impurities.   3. ** Install the clamp ** : Align the opening of the pre-opened spring clamp with the installation part, and then tighten the screw or nut of the clamp with a screwdriver or wrench until the clamp is firmly fixed on the installation part.   4. ** Check the installation effect ** : After the installation is completed, check whether the clamp is firm, whether there is loosening or deformation. If the problem is found, it should be adjusted or replaced in time.   The steps to remove the pre-opened spring clamp are as follows:   1. ** Preparation ** : Select the appropriate size and type of removal tools, such as clamp pliers, screwdrivers, etc. At the same time, ensure that the surface of the disassembly tool is smooth and free of damage.   2. ** Loosen the clamp ** : Loosen the screw or nut of the pre-opened spring clamp with the clamp pliers or screwdriver until the opening of the clamp becomes larger.   3. ** Remove the clamp ** : Align the opening of the clamp with the installation part, and then remove the clamp from the installation part by hand or tool.   4. ** Check the disassembly effect ** : After the disassembly is completed, check whether the installation part is damaged or deformed. If the problem is found, it should be repaired or replaced in time. It should be noted that when installing and removing the pre-opened spring clamp, the relevant safety specifications and operating procedures should be followed to ensure the safety of the operator. At the same time, the appropriate installation and disassembly method should be selected according to the actual situation to ensure the installation and disassembly effect of the clamp.  

    detials

  • Why should manganese steel spring clamp be used for the connection of automobile original pipeline?
    2025 - 09 - 18 Why should manganese steel spring clamp be used for the connection of automobile original pipeline?
    The spring clamp made of manganese steel is used for the connection of the original automobile pipeline, mainly for the following reasons:   First, the characteristics of manganese steel High strength: Manganese steel is an iron alloy, mainly composed of iron, manganese, carbon and other elements, with high strength, can withstand greater pressure and tension, so as to ensure the stability of the pipeline connection. High wear resistance: Manganese steel has good wear resistance and can maintain good performance during long-term use, reducing the risk of connection loosening or failure caused by wear. Good toughness: Manganese steel has good toughness and is not easy to deform or break when impacted or squeezed, thus ensuring the safety of pipeline connections. Second, the advantages of spring clamps Elastic deformation: The spring clamp strengthens the pipe connection through the elastic deformation of the spring, so that it is not easy to slide and deformation. This elastic deformation can adapt to the small deformation caused by temperature changes, vibration and other factors during the use of the pipeline, so as to maintain the stability of the connection. Sealing performance: The spring clamp can tightly wrap the hose during installation and fix the hose in the desired position through the spring's elasticity. At the same time, there is usually a gasket made of elastic material inside the clamp, which can play the role of buffering and sealing when the clamp is tightened to prevent liquid or gas leakage. Easy installation and maintenance: The spring clamp is relatively easy to install and remove, and does not require complex tools or equipment. At the same time, because of its good reusability, it is also more convenient in maintenance and replacement. Third, to meet the needs of automotive pipeline connection Withstand complex conditions: The car will experience a variety of complex conditions during use, such as high-speed driving, sudden braking, bumps and so on. The spring clamp made of manganese steel can withstand various forces and vibrations generated under these working conditions to ensure the stability and safety of the pipeline connection. Adapt to temperature changes: The car will generate a lot of heat during use, resulting in an increase in the temperature of the pipeline and its connectors. Manganese steel material has high temperature resistance, can maintain good performance in high temperature environment, so as to ensure the reliability of pipeline connection. Ensure vehicle performance: automotive pipeline connection is an important part of the automotive hydraulic or pneumatic system, and its stability and reliability are directly related to the overall performance of the car. The spring clamp made of manganese steel can provide a solid connection and reliable sealing performance, thus ensuring the normal operation of the hydraulic or pneumatic system of the automobile. To sum up, the spring clamp made of manganese steel is used for the connection of the original automobile pipeline because of its high strength, high wear resistance, good toughness and its own advantages, so as to meet the needs of the automobile pipeline connection in complex working conditions.

    detials

  • Stainless steel clamp fastening tutorial
    2025 - 09 - 19 Stainless steel clamp fastening tutorial
    The fastening process of stainless steel clamps needs to follow certain steps and precautions, the following is a detailed fastening tutorial:   1. Prepare tools and materials Select the right stainless steel clamps: Select the right size and type of stainless steel clamps according to the diameter of the pipe and the required pressure level. Prepare necessary tools: including clamp pliers (not common cable tie pliers on the market, need to choose durable, non-deforming material, such as No. 55 steel), torque wrench (used to evenly tighten bolts, avoid excessive tightening caused by deformation), etc. Second, installation steps Check pipes and clamps: Ensure that the pipe surface is clean and free from damage, and the clamps are free from corrosion, deformation and other defects. Insert clamp: Put stainless steel clamp on the pipe, ensuring that the opening direction of the clamp is consistent with the axial direction of the pipe. At the same time, the inner diameter of the clamp before clamping should be slightly larger than the outer diameter of the pipe, so that it can be easily inserted. Preliminary positioning: Preliminarily fix the ear of the clamp on the pipe by hand to ensure that the clamp fits closely with the pipe. Clamp with a clamp clamp: Align the jaws of the clamp clamp with the root of the clamp ear and clamp the clamp in one step. Be careful not to apply pressure twice, and the two sides of the ear should not touch together after clamping. Since the single-ear clamp is clamped using the plastic deformation of the metal, it is necessary to pay attention to the moderate deformation when clamping, neither too small to cause insufficient clamping force, nor too large to cause damage to the clamp. Check the fastening condition: After clamping, the fastening condition of the clamp can be initially judged by naked eye observation and hand pushing. If necessary, a torque wrench can be used to further tighten the bolt to ensure that the clamp achieves the required tightening torque. Third, precautions Choose the right clamp clamp: be sure to choose good quality, wear-resistant clamp clamp, avoid the use of ordinary tools such as cable pliers on the market, so as not to damage the clamp or affect the fastening effect. Avoid secondary pressure: When clamping the clamp, it should be in place in one step to avoid deformation or damage of the clamp caused by multiple pressures. Uniform fastening: If the stainless steel clamp connected by bolts is used, a torque wrench should be used to tighten the bolts evenly to avoid deformation or damage caused by excessive tightening. Regular inspection: After the installation is completed, the fastening of the clamp should be checked regularly, and if it is loose, it should be tightened in time to ensure the safe operation of the pipeline system. Following the above tutorial and precautions can ensure the proper installation and fastening of stainless steel clamps, thereby improving the stability and safety of the piping system.

    detials

  • Stainless steel clamp function
    2025 - 09 - 20 Stainless steel clamp function
    Stainless steel clamp plays a vital role in the pipeline system, its main role includes the following aspects:   First, pipeline connection Stainless steel clamps can firmly connect the two pipes together to ensure the continuity and integrity of the pipeline system. This connection is not only simple and fast, but also has a high connection strength and can withstand a certain amount of pipeline pressure and tension.   Two, pipeline fixed In the pipeline system, stainless steel clamps can be used to fix the pipeline to prevent the pipeline from shaking or shifting due to external force. Especially in some complex or special pipeline layouts, the fixing role of stainless steel clamps is particularly important, which helps to ensure the stability and safety of the pipeline system.   Three, pipeline sealing Through its unique clamping structure, the stainless steel clamp can effectively seal the pipe connection and prevent fluid leakage. This sealing performance is crucial in liquid or gas transmission systems, helping to avoid resource waste and environmental pollution.   4. Withstand stress The stainless steel clamp has a high pressure capacity and can withstand the operation requirements of the pipeline system in a high pressure environment. This pressure bearing capacity ensures the stability and safety of the pipeline system under high pressure conditions.   5. Strong adaptability The material and structural design of the stainless steel clamp enable it to adapt to a variety of different working environments and media requirements. For example, in the chemical, petroleum, paper, food, medicine and other industries, stainless steel clamp because of its corrosion resistance, high temperature resistance and other characteristics are widely used.   6. Easy installation The installation process of stainless steel clamps is relatively simple and does not require complex tools and techniques. This helps to reduce installation costs and time and improve work efficiency. At the same time, the removal of the stainless steel clamp is also relatively easy, which is easy to maintain and replace the pipeline.   In summary, stainless steel clamps have a variety of important roles in the pipeline system, including pipeline connection, fixing, sealing, pressure resistance, strong adaptability and easy installation. These functions together ensure the normal operation and safety of the pipeline system.  

    detials

  • Three common mistakes in installing Hose Clamp
    2025 - 09 - 22 Three common mistakes in installing Hose Clamp
    The three common mistakes when installing the hose band mainly include the following points:   First, the hose clamp installation position is wrong Problem description: The installation position of the hose strap deviates from the correct installation area, resulting in the hose strap is not fully covered. Potential consequences: Because the hose band does not cover the hose correctly, the hose band is easy to fall off after a long time of work, especially in the presence of vibration environment. This can lead to a loose seal, which can lead to liquid or gas leaks. 2. Inclined installation of throat hoop Description of the problem: The throat band does not maintain a horizontal or vertical state during installation, but presents a tilted state.   Potential consequences:   The inclined throat band may cause the edge of the band to cut the hose, reducing the strength and sealing performance of the hose. In the case of vibration or pressure changes, the inclined throat band is more likely to loosen or fall off. Uneven stress points may lead to excessive pressure on the hose band at a specific location, which accelerates wear and damage. Third, the tube is not inserted in place Problem description: The connection between the hose and the hard pipe is not tight, and the pipe is not inserted in place.   Potential consequences:   The tube is not inserted in place, which means that the throat band needs to rely on greater tightening force to maintain the seal. However, when the pipe is subjected to external forces (such as rocking, shaking), this fastening force may be destroyed, causing the throat band to fall off. Improperly inserted tubes can also result in a loose seal, which can cause leaks. Suggestions for correct installation of hose straps Ensure correct placement: Before installing the hose strap, carefully check the installation area to ensure that the hose strap fully covers the hose and is located in the manufacturer's recommended installation location. Maintain horizontal or vertical installation: When installing the hose band, ensure that the band is kept horizontal or vertical and avoid inclined installation. This helps ensure uniform force on the hose band and reduces the risk of cutting the hose. Pipe in place: When connecting a hose to a hard pipe, make sure the pipe is in place and snug to the hard pipe. This helps to enhance the sealing performance and reduces the risk of the throat band falling off. In summary, the correct installation method and precautions are crucial to ensure the normal use and sealing performance of the hose hoop. When installing the hose band, be sure to follow the manufacturer's instructions and recommendations, and carefully check each installation step to ensure the correctness and reliability of the installation.  

    detials

  • The application of DIN 3016 hose clamps in the construction and HVAC industries
    2025 - 09 - 22 The application of DIN 3016 hose clamps in the construction and HVAC industries
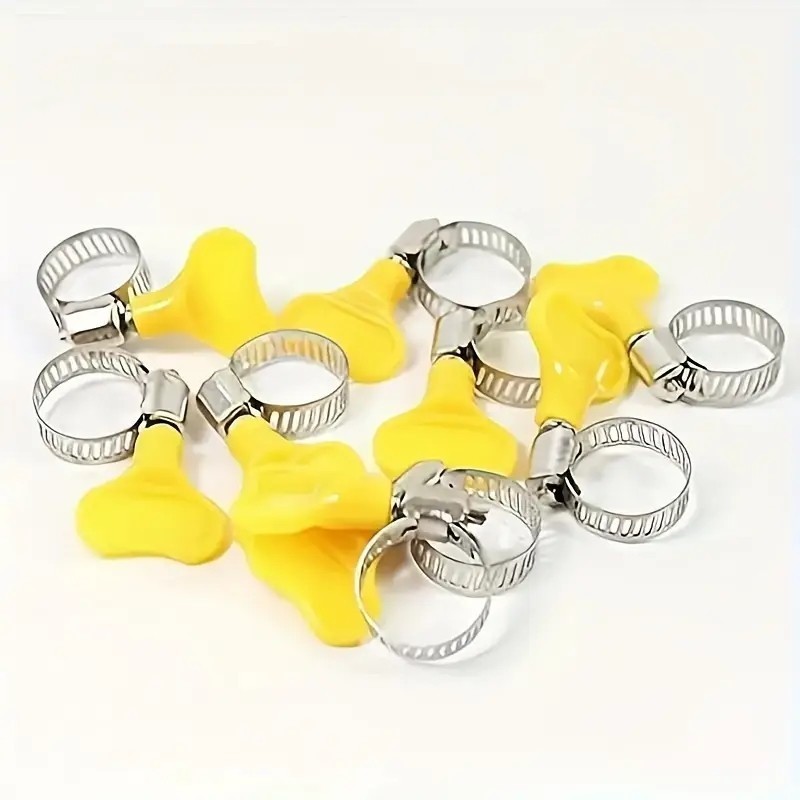
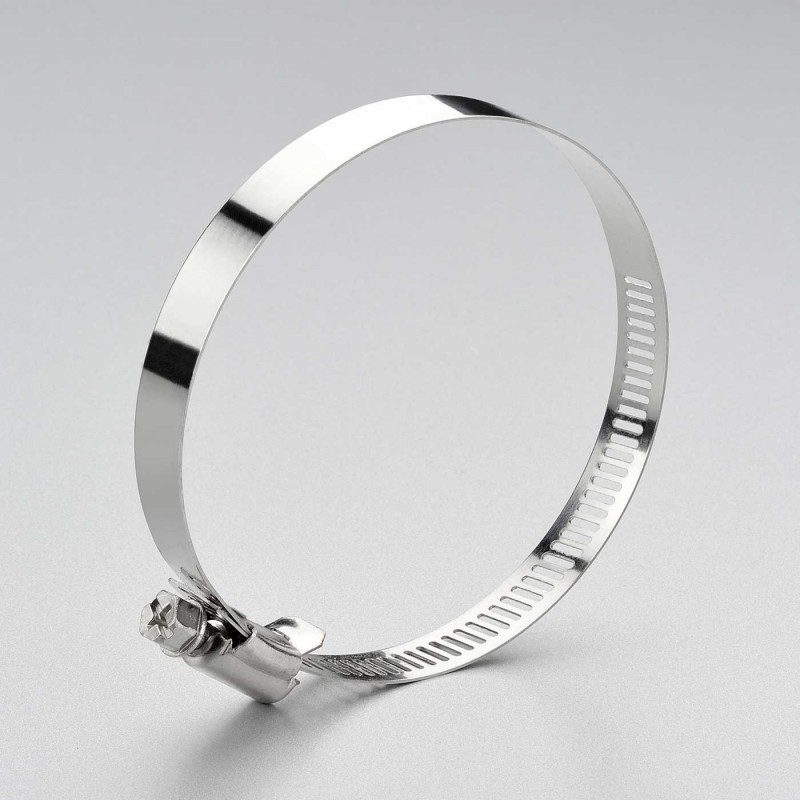
    DIN 3016 hose clamps are widely used in the construction and HVAC industries due to their versatility and reliability. These clamps are designed to secure and hold various pipes, ducts, and cable assemblies. In construction, they provide necessary support for infrastructure components; while in HVAC systems, they ensure the proper positioning of ducts and pipes. They perform well in both applications.   Benefits of Using DIN 3016 Hose Clamps in Construction There are many benefits to using DIN 3016 hose clamps in construction projects. Firstly, these clamps offer strong support, helping to maintain the stability of installed materials. Additionally, they are easy to install, saving assembly time. Moreover, their adjustable design makes them compatible with different diameter hose clamps, suitable for various applications. In summary, these clamps can enhance construction efficiency and reliability.   Durability and Corrosion Resistance Advantages DIN 3016 clamps have significant advantages in terms of durability and corrosion resistance. These clamps are made of high-quality materials and can withstand harsh environmental conditions. This durability ensures their long-term functionality. Moreover, clamps with corrosion-resistant coatings are ideal for projects exposed to moisture or corrosive substances. Therefore, they reduce the need for frequent replacements, saving time and costs.   Common Construction Applications of DIN 3016 Hose Clamps DIN 3016 clamps are frequently used in various construction applications. One of their main uses is to secure pipes. Additionally, they can effectively fix pipe systems and support electrical conduits. These clamps can also effectively manage cables on construction sites, preventing tangling and ensuring orderly installation. Their versatility makes them an essential tool on any construction site.   Supporting Electrical Conduits and Cable Management Supporting electrical conduits and managing cables are important applications of DIN 3016 hose clamps. By firmly fixing electrical conduits, these clamps help prevent any movement or displacement during construction. This ensures that the electrical system remains intact and functions properly. Additionally, by organizing and fixing cables, the clamps can reduce the risk of accidents. Proper cable management also facilitates connections and enhances on-site safety.   The Role of DIN 3016 Hose Clamps in HVAC Systems In HVAC systems, DIN 3016 hose clamps play a crucial role. These clamps are essential for securing pipes, ducts, and other components in place. By ensuring proper connection of components, they help the system operate efficiently. Moreover, these clamps prevent pipes from sagging or disconnecting, thereby maintaining necessary airflow. Their importance in achieving optimal HVAC performance is undeniable.   Specialized HVAC Applications of DIN 3016 Clamps DIN 3016 clamps are suitable for professional HVAC applications. For example, they can be used to secure refrigerant lines, ensuring efficient operation of cooling systems. Additionally, these clamps can stabilize ventilation ducts, which is crucial for maintaining uniform airflow. In exhaust systems, they can prevent any loosening of components that could lead to efficiency losses. Their adaptability to different HVAC components makes them a valuable tool in any HVAC installation.   Best Practices for DIN 3016 Hose Clamps Proper installation of DIN 3016 hose clamps is crucial for achieving optimal performance. Firstly, ensure that all components are correctly aligned before tightening the clamps. This alignment helps prevent excessive pressure on the fixed objects. In addition, using the appropriate tools for installation is also crucial to avoid damaging the hose clamps or materials. Regularly inspecting the hose clamps after installation helps maintain their effectiveness and ensure long-term stability. Steps to Ensure Correct Installation 
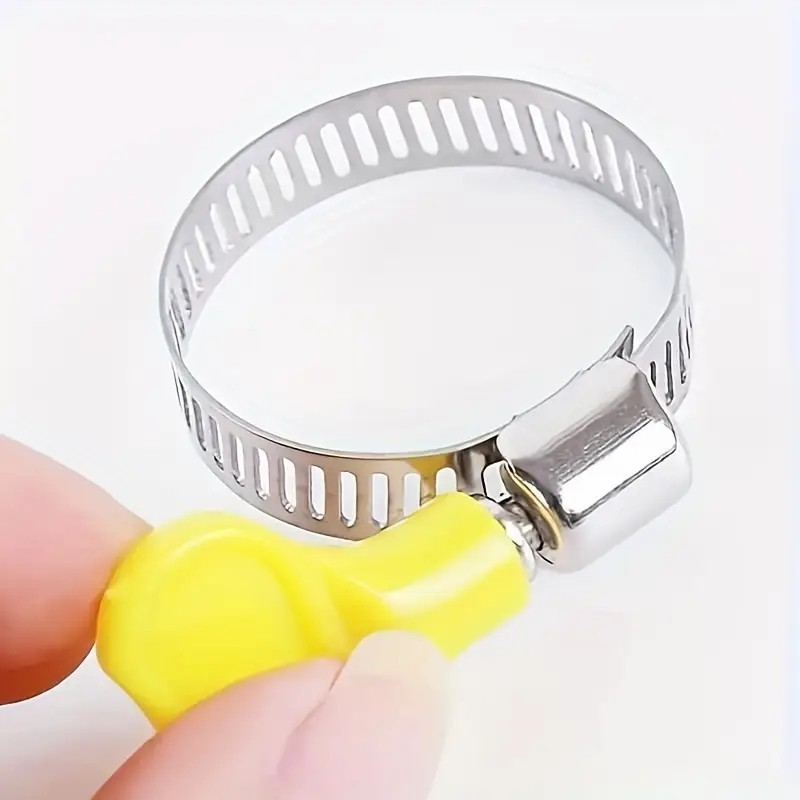
Ensuring the correct installation of DIN 3016 hose clamps involves several key steps. First, select the appropriate size of the hose clamp based on the application to ensure a tight fit. Next, evenly place the hose clamp around the object to be fixed to distribute the pressure evenly. After installing the hose clamp, tighten it fully but not excessively, as over-tightening may damage the material. Finally, checking the fit of the hose clamp after installation helps confirm that all components are securely and stably in place. 
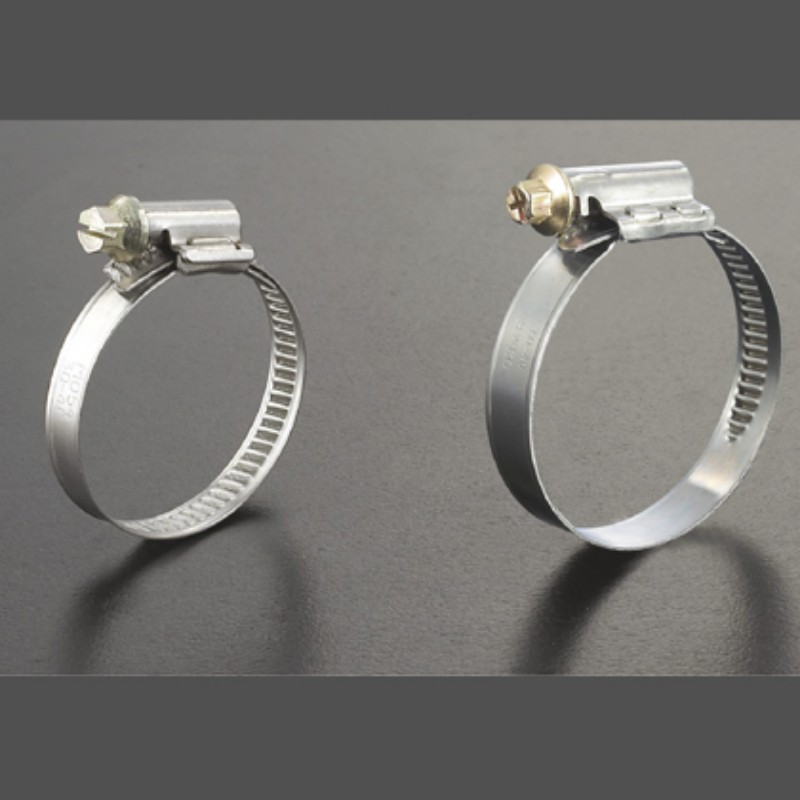
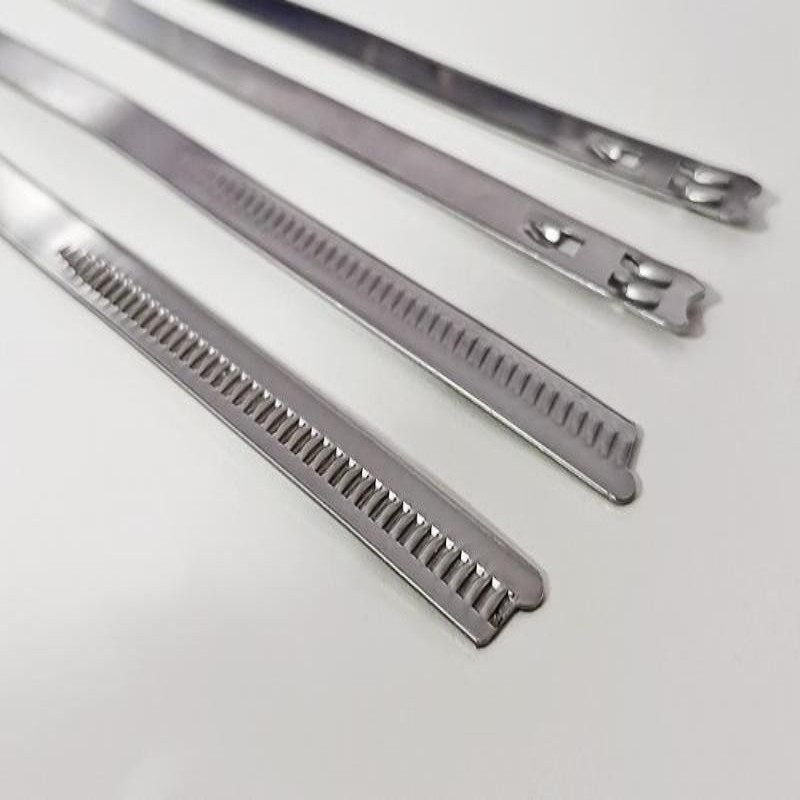
Material Selection and Its Impact on Performance 
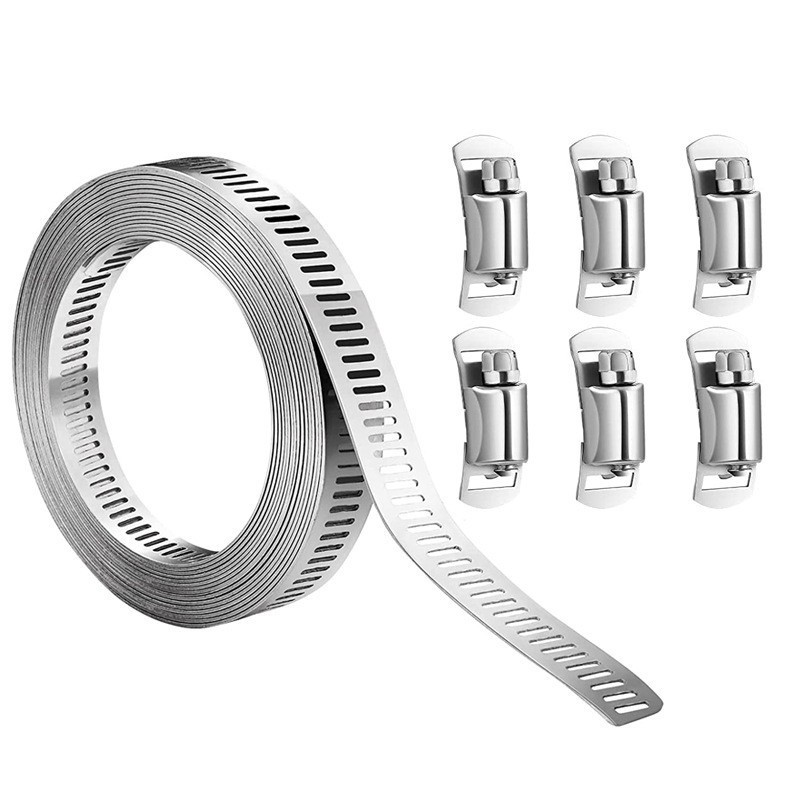
Choosing the right material for DIN 3016 hose clamps significantly affects their performance. Stainless steel hose clamps offer high strength and corrosion resistance, making them ideal for harsh environments. On the other hand, galvanized steel hose clamps provide a more cost-effective solution for less severe conditions. Additionally, for light applications where corrosion is not a concern, plastic hose clamps may be a better choice. Understanding these options helps make informed decisions for each project. Stainless Steel for Corrosive Environments Stainless steel clamps are the ideal choice for corrosive environments. This material has excellent anti-rust properties and can effectively resist corrosion caused by chemicals or moisture. Therefore, even in harsh conditions, stainless steel clamps can maintain their integrity and performance. In the long run, using these clamps can reduce the risk of failure and costly replacements. Therefore, we strongly recommend them for industrial applications and environments with high stress. Rubber-Lined Noise-Reducing Hose Clamps Rubber-lined clamps are an excellent solution for noise reduction in various applications. The rubber lining acts as a buffer, minimizing the transmission of vibrations between pipes or ducts and their supports. This feature not only reduces noise but also prevents long-term material wear. Moreover, these clamps provide additional protection for delicate surfaces, ensuring a flawless installation. They are particularly suitable for HVAC and piping systems where noise control is necessary. 
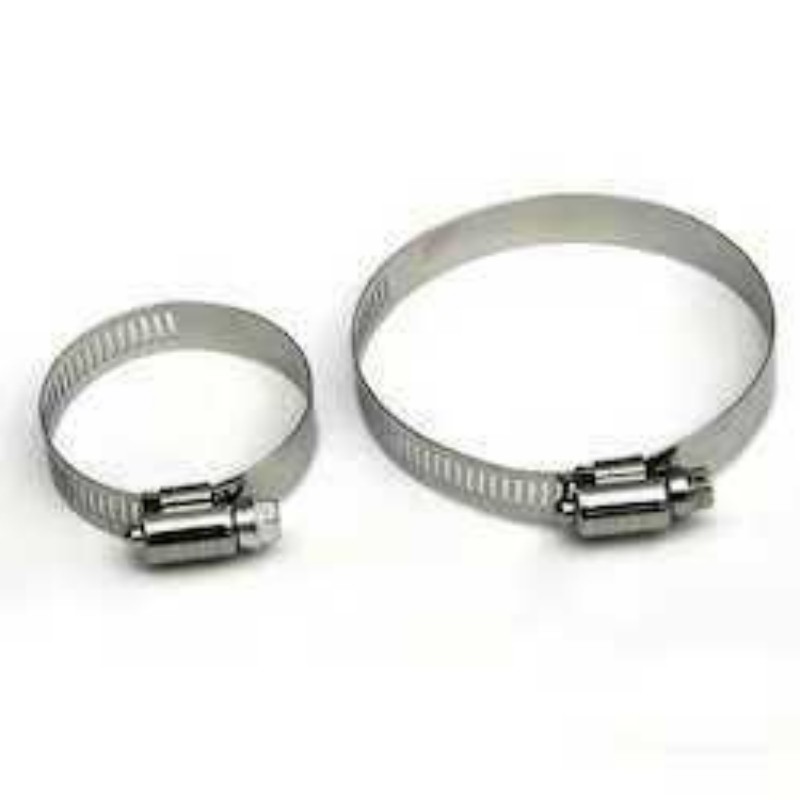
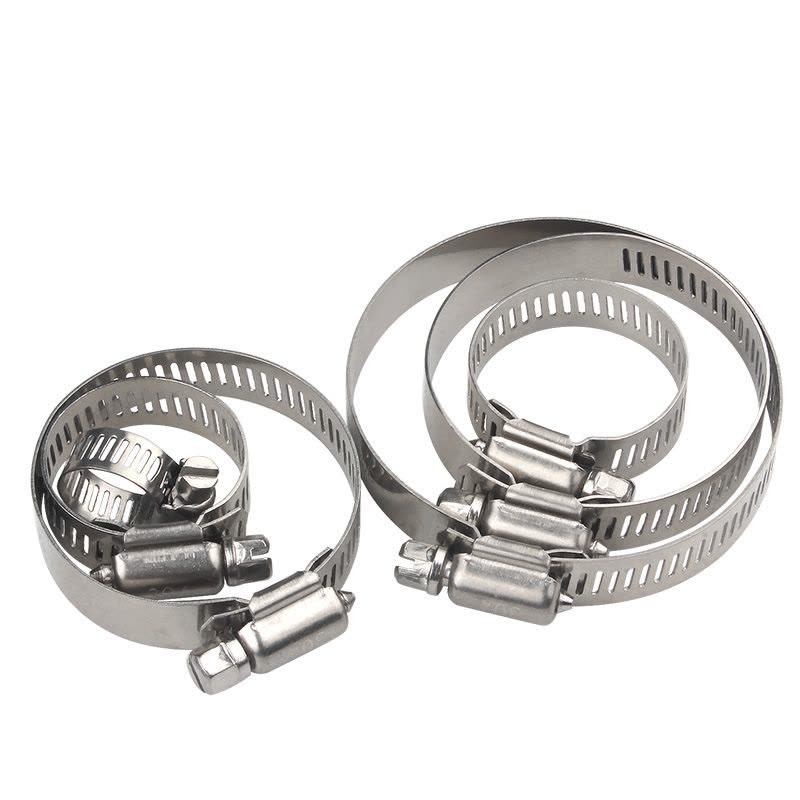
How to Choose the Right DIN 3016 Hose Clamp? Choosing the right DIN 3016 hose clamp requires considering several important factors. First, assess the application to determine the appropriate size and type of hose clamp needed. Selecting the right material based on environmental conditions also affects performance. Additionally, consider any features that may facilitate installation, such as rubber linings for protection or insulation. Taking the time to evaluate these factors ensures the best functionality and lifespan of the hose clamps in the project. Factors to Consider When Choosing a Hose Clamp When choosing a hose clamp, keep the following factors in mind: - Application type: Determine where the hose clamp will be used. - Hose clamp size: Measure the diameter of the object to be fixed. - Material selection: Choose based on environmental exposure. - Insulation requirements: Consider using insulated hose clamps for added protection. Installation conditions: Evaluate whether special features are needed for easier installation.

    detials

  • Five signs indicating it's time to replace the hose clamps
    2025 - 09 - 23 Five signs indicating it's time to replace the hose clamps
    The hose clamp is a crucial component in various applications. Understanding when to replace the hose clamp is essential for maintaining the integrity of the system. The following five signs indicate that the hose clamp needs to be replaced: First, the hose clamp shows obvious corrosion or rust; second, there is liquid leakage at the connection; third, the clamping force of the hose clamp is insufficient or loose; fourth, the soft pipe material near the hose clamp shows cracks or damage; fifth, frequent adjustments or repairs are required. Timely handling of these signs can prevent further damage and ensure reliable performance. The Importance of Maintaining Hose Clamps Maintaining hose clamps is crucial for the overall performance of the system they belong to. A functioning hose clamp ensures the firm fixation of the soft pipe, preventing leaks and system failures. Regular inspection and maintenance help to detect wear conditions, allowing for timely replacement before problems arise. This not only extends the lifespan of the soft pipe but also reduces the risk of accidents caused by liquid leakage, thereby enhancing safety. Investing time in maintenance can avoid costly repairs and downtime, thus saving significant costs.   Common Risks of Ignoring Worn Hose Clamps Ignoring worn hose clamps can bring about some serious risks, affecting safety and functionality. These risks include:  Liquid leakage: May cause contamination and operational failures.  Increased downtime: Replacing damaged parts requires time and resources.  System failure: May lead to expensive repairs and replacement of larger systems.  Safety hazards: Leaking liquids can create a dangerous working environment.  Soft pipe damage: Worn clamps will damage the soft pipe, requiring additional replacements. Active maintenance of clamps can avoid these potential serious consequences. Sign 1: Visible corrosion or rust on the clamp Visible corrosion or rust on the hose clamp indicates that it needs to be replaced. This corrosion weakens the structure of the hose clamp and reduces its ability to firmly fix the soft pipe. Corroded hose clamps can cause leaks, endangering the entire system. It is crucial to handle any signs of rust promptly as they may escalate into more serious problems. Regular inspections help to detect corrosion early, allowing for replacement before damage occurs. Using stainless steel or coated hose clamps can reduce the risk of corrosion. How Corrosion Affects Clamping Performance of Hose Clamps Corrosion significantly affects the performance of hose clamps, weakening their grip and structural integrity. Corrosion causes the hose clamp to lose its sealing ability, resulting in fluid leakage and increased pressure on the soft pipe. Performance degradation may lead to accidental failure of the hose clamp, causing system failures. Additionally, the uneven surface caused by corrosion leads to further wear on the soft pipe, eventually causing it to be damaged prematurely. Ensuring that the hose clamp is free of corrosion is crucial for maintaining a safe and reliable connection. Preventing Hose Clamp Rusting Preventing hose clamp rusting is essential for extending its lifespan and performance. Here are some effective strategies:  Use stainless steel clamps: They are more resistant to corrosion.  Apply anti-rust coatings: The protective layer can significantly reduce rusting.  Regular inspection and cleaning of the clamp: Removing dirt and moisture helps prevent oxidation.  Ensure proper installation: Tightening the clamp correctly to avoid rusting water pools.  Proper storage of the hose clamp: Please store it in a dry place to prevent environmental damage. Taking these measures can greatly enhance the durability of the hose clamp. Sign 2: Liquid leakage around the connection Liquid leakage around the connection is an important signal that the hose clamp needs to be replaced. This leakage usually indicates that the hose clamp is no longer tight or secure, which may be caused by wear, corrosion, or improper installation. Timely handling of the liquid leakage is crucial as it may lead to larger system problems, resource waste, and safety hazards. Regular inspections of the leakage help to detect hose clamp failures early, allowing for timely replacement to maintain system efficiency and safety. Do not overlook leaks, as they indicate potential problems.   Why does leakage indicate fixture failure? Leakage around the hose connection is a clear sign of a clamp failure, usually caused by multiple factors. Firstly, corrosion or rust can weaken the clamp and reduce its ability to maintain a seal. Secondly, if the clamp becomes loose due to vibration or temperature changes, it can no longer provide a firm support, leading to leakage. Finally, a worn-out clamp may not be properly installed, creating gaps that allow liquid to escape. Ignoring these leaks can cause serious damage to the system and increase maintenance costs. Sign 3: Loss of tightness or loose fixture Loss of tightness or looseness of the hose clamp is an important signal that requires replacement. A loose hose clamp can cause serious problems, including liquid leakage, hose damage, and even system failure. Regular inspection of the tightness of the hose clamp is crucial because even a slight looseness can damage the integrity of the entire system. Factors such as vibration, temperature fluctuations, and corrosion can cause the hose clamp to loosen over time. Addressing this issue promptly can prevent further damage and ensure the smooth operation of the system. Danger of loose hose clamp A loose hose clamp brings multiple dangers that affect safety and system functionality. Some of the main dangers include:  Liquid leakage: May cause contamination and operational failures.  Hose damage: Increases friction and movement, causing the hose to tear or weaken.  System failure: May lead to expensive repairs or replacement of critical components.  Safety hazard: Leaking liquid can pose a danger to workers.  Increased maintenance costs: Frequent repairs due to clamp failure will increase costs. Maintaining the appropriate tightness of the hose clamp is crucial for preventing these risks. How to properly tighten the hose clamp Proper tightening of the hose clamp is essential for ensuring a secure connection and preventing leakage. Please follow the steps below to effectively tighten:  Select the correct tool: Use a screwdriver or socket wrench suitable for the clamp type.  Align the hose correctly: Ensure the hose is in the correct position before tightening.  Uniform tightening: Apply constant pressure to avoid damaging the hose or the clamp.  Do not over-tighten: This may cause the hose to compress and eventually damage it.  Regularly check the tightness: Pay attention to the clamp and maintain the appropriate tension. Following these steps can ensure that the hose clamp remains tight. Sign 4: Rupture or damage to the hose material near the fixture Rupture or damage to the hose material near the hose clamp is a concerning signal that requires replacement. This damage usually occurs when the hose clamp is too tight, causing the hose to bear unnecessary pressure, or when a worn-out hose clamp causes the hose to move excessively. Dealing with hose damage is crucial because if left untreated, it may lead to leakage and system failure. Regular inspection of the hose and hose clamp helps prevent such problems and ensures a secure connection without damaging the integrity of the hose. Timely replacement of damaged hoses is necessary to maintain their normal function. How the hose clamp damages the hose over time The hose clamp will damage the hose over time due to various factors. Firstly, if the clamp is tightened too tightly, it may create pressure points, causing cracks and tears in the hose material. Secondly, corrosion or worn-out clamps can lead to uneven wear, resulting in weak points on the hose. Finally, a loose clamp will cause excessive movement, leading to hose wear and premature failure. It is necessary to monitor both the clamp and the hose simultaneously to prevent damage and ensure a reliable, leak-free connection between components. Selecting the appropriate clamp to prevent damage Selecting the appropriate clamp is crucial for preventing hose damage. Here are some key considerations:  Clamp size: Ensure the clamp size is suitable for the hose to ensure a secure fit.  Material: Choose a corrosion-resistant material, such as stainless steel, to ensure durability.  Clamp type: Select the appropriate clamp type for your application (e.g., worm gear, spring).  Fastening mechanism: Select a mechanism that can evenly tighten without excessive force.  Application details: Please consider the pressure and temperature of the system. Choosing the appropriate clamp helps maintain the integrity of the hose and prevents premature damage. Sign 5: Frequent adjustments or repairs are required If you find that you need to frequently adjust or repair the hose clamp, it's time to replace it. A loose or frequently malfunctioning hose clamp indicates that the current one is worn out or not suitable for the application. This situation may lead to increased downtime, decreased user satisfaction, and potential damage to the hose and surrounding systems. Upgrading to a more durable and reliable hose clamp can reduce the need for frequent adjustments and ensure a stable and reliable connection. Investing in high-quality hose clamps can enhance the reliability and performance of the system. Upgrade to a durable and reliable clamp Upgrading to a durable and reliable hose clamp is crucial for reducing maintenance workload and improving system performance. When choosing a new hose clamp, consider factors such as material strength, corrosion resistance, and specific application requirements. Stainless steel hose clamps have excellent durability and the ability to withstand environmental factors. Additionally, ensure that the new hose clamp has the appropriate fit and effective fastening mechanism to prevent future problems. This upgrade can not only save maintenance time but also ensure a safer and more efficient operating environment. How to choose the appropriate replacement hose clamp? Choosing the appropriate replacement hose clamp requires considering several important factors. First, determine the appropriate size to ensure it matches the diameter of the hose. Secondly, select the material based on environmental conditions and potential corrosion risks; stainless steel is usually a good choice. Thirdly, understand the specific application requirements and choose the appropriate type of hose clamp, whether adjustable or fixed. Finally, consider the fastening mechanism to ensure ease of installation and safety during the installation process. These factors will ensure that you choose the appropriate replacement hose clamp. Key factors to consider when replacing the clamp When replacing the hose clamp, consider several key factors to ensure the correct selection:  Size: Measure the diameter of the hose to select the appropriate clamp size.  Material: Choose a durable and corrosion-resistant material.  Type: Select the type of clamp that is most suitable for your application and requirements.  Fastening system: Ensure the system is easy to install and securely fastened.  Application conditions: Consider the temperature and pressure requirements of the specific use. Considering these factors will help you make a wise decision when replacing the hose clamp. When to seek professional help for replacing the clamp Understanding when to seek professional help for replacing the hose clamp is crucial. If you encounter persistent problems, such as severe leakage, severe damage to the hose, or difficulty in tightening the clamp, you should consult a professional. Additionally, if the application involves high pressure or critical systems, expert assistance can ensure a safe and effective replacement. Professionals can guide you in selecting the appropriate type and size of the clamp to avoid potential future failures. If necessary, seek help at any time.

    detials

  • A Comprehensive Guide to Using Heavy-Duty Clamps
    2025 - 09 - 24 A Comprehensive Guide to Using Heavy-Duty Clamps
    Heavy-duty clamps are commonly used fastening accessories in pipe connections, widely applied in water pipes, gas pipes, oil pipes, and various other pipe systems. Their core function is to ensure a tight seal at pipe interfaces through high-intensity clamping force. Correct use of heavy-duty clamps not only extends the service life of the pipe system but also prevents safety hazards such as leakage and detachment caused by improper tightening. The following are detailed usage steps, precautions, and solutions to common problems. I. Preparations Before Use: Tools and Inspection Are Both Essential Before starting the operation, it is necessary to prepare the tools and inspect the clamps and pipes. This is the foundation for ensuring the installation effect. List of Essential Tools Basic Tools: Select the corresponding tools based on the type of clamp, such as a flat-head screwdriver, a Phillips screwdriver (for screw-type clamps), an adjustable wrench, and a socket wrench (for bolt-type clamps); for quick-release clamps, they can be operated directly by hand without additional tools. Auxiliary Tools: A tape measure (to measure the pipe diameter and confirm if the clamp size is compatible), a cotton cloth (to clean the pipe interface surface), and gloves (to protect the hands from being scratched by pipe burrs or clamp edges during installation). Key Inspection Steps Check the clamp: Ensure there is no deformation, cracks, rust, or other damage to the clamp, and that the screws/bolts are not stripped. If there is a gasket (if applicable), check that it is not aged or damaged. Ensure the structure is intact and meets strength requirements. Check the pipe: Clean the oil, dust, and burrs at the pipe interface to ensure the surface is smooth. If it is a new pipe, confirm that the interface size matches the clamp specification (the inner diameter of the clamp should be slightly smaller than the outer diameter of the pipe, typically with a difference of 1-3mm to ensure sufficient sealing force after clamping). II. Core Operation Steps: Four Steps to Secure Installation The installation of heavy-duty clamps follows the process of "positioning - clamping - pre-tightening - tightening". During the operation, control the force to avoid over-tightening and damaging the pipe or clamp. Step 1: Determine the Installation Position Align the two pipes to be connected and ensure the interfaces are fully in contact (if connecting a flexible pipe to a rigid pipe, insert the flexible pipe into the rigid pipe interface by at least 2-3cm to avoid detachment due to only covering the edge of the interface). Mark the clamp installation position: The clamp should be placed in the middle of the pipe interface, not at the edge, to ensure the clamping force is evenly distributed over the interface. If multiple clamps are needed (for large-diameter pipes), the recommended spacing between adjacent clamps is 5-10cm, and they should be symmetrically distributed. Step 2: Insert the Heavy-Duty Clamp Loosen the screws/bolts of the clamp, spread the open end of the clamp, and slowly place it over the marked pipe interface. Ensure the clamp's steel band/clamp body fully wraps around the pipe without any offset or distortion. If the clamp has a gasket (such as a rubber gasket), confirm that it is tightly against the pipe surface without any wrinkles. The gasket's role is to enhance the seal and prevent wear on the pipe from direct contact with the metal clamp. Step 3: Pre-tighten and Fix Use your hand to turn the screws/bolts of the clamp or use a tool to gently rotate it, initially tightening the clamp until the clamp body is in contact with the pipe surface. At this point, the pipe should not be loose but still allow for slight adjustment (avoid excessive force during the pre-tightening stage to prevent inability to adjust later). Adjust the pipe and clamp: Confirm that the pipe interface is not misaligned and the clamp position is accurate before proceeding to the next step of tightening. If the pipe is misaligned, release the pre-tightening force, realign, and pre-tighten again. Step 4: Final Tightening (Critical Step) Select the appropriate tool: Use a screwdriver of the corresponding size for screw-type clamps and a wrench for bolt-type clamps. Apply force perpendicular to the screws/bolts and slowly turn the tool to gradually tighten the clamp. Control the tightening force: This is the core to avoid damage - observe the changes in the pipeline during tightening. When the surface of the pipeline shows slight deformation (such as a slight indentation on the hose), or when the tool feels significant resistance, stop. Different materials require different forces: plastic pipelines need to be tightened gently to avoid cracking; metal pipelines can be tightened more firmly, but avoid deforming the steel band of the clamp. Check the seal: After tightening, shake the pipeline by hand to ensure it is not loose. If conditions permit, apply soapy water to the connection and observe for bubbles (if there are bubbles, it indicates a leak and the clamp or pipeline needs to be re-tightened or inspected for damage). III. Precautions for Use: Avoid Common Mistakes to Ensure Safety and Durability Matching specifications is the prerequisite Never use clamps of incorrect size: If the inner diameter of the clamp is too large, it won't hold the pipeline tightly, causing leakage; if it's too small, forcing it on will deform the clamp or damage the pipeline. When purchasing, clearly identify the outer diameter of the pipeline and choose the corresponding size of the clamp (for example, if the pipeline's outer diameter is 25mm, select a clamp with an inner diameter of 22-25mm). Material compatibility for corrosion resistance Choose the material of the clamp based on the usage environment: For corrosive environments such as water, acids, and alkalis, use stainless steel clamps (such as 304 stainless steel) to avoid rust and failure of ordinary carbon steel clamps; for high-temperature environments (such as engine pipelines), use high-temperature resistant steel band clamps to prevent the clamp from aging due to high temperatures. Avoid over-tightening Over-tightening is the most common mistake: it can cause the pipeline (especially plastic and rubber pipes) to crack or deform, and in severe cases, it can cause the clamp screws to strip or the steel band to break, losing its tightening effect. Follow the principle of "stop when significant resistance is felt" during tightening; there is no need to tighten to the maximum. Regular inspection and maintenance Regular checks are necessary after installation: especially in scenarios with significant vibration (such as mechanical equipment pipelines), check the tightness of the clamps weekly and confirm the seal every three months. If rust is found on the clamp, the screws are stripped, or there is a leak in the pipeline, replace the clamp promptly to prevent accidents. IV. Common Problems and Solutions Q&A Possible Causes Solutions Leakage at pipe connection 1. The clamp is not tightened properly; 2. The size of the clamp does not match; 3. The pipe connection is damaged 1. Retighten the clamp. If leakage persists, check if the size matches; 2. Replace with a clamp of the correct size; 3. Repair or replace the damaged pipe Loose or stripped clamp screws 1. The tool used is not the right size, causing the screw to break; 2. Over-tightening, causing excessive force on the screw 1. Use the correct tool. If the screw is stripped, replace the entire clamp; 2. Follow the correct tightening force and avoid excessive force Soft hose crushed by the clamp 1. The clamp material is too hard (e.g., metal clamps used directly on thin-walled hoses); 2. Excessive tightening force 1. Replace with a clamp with a rubber liner or place a soft cloth between the clamp and the hose; 2. Reduce the tightening force to the point where there is no leakage and the pipe is not loose Rusty and ineffective clamp 1. The clamp material is not corrosion-resistant (e.g., carbon steel used in a humid environment); 2. Long-term lack of maintenance 1. Replace with a corrosion-resistant clamp such as stainless steel; 2. Regularly clean the clamp and apply anti-rust agent to metal parts (non-sealing surfaces)

    detials

  • Precautions for the selection of non-standard automation equipment
    2025 - 09 - 25 Precautions for the selection of non-standard automation equipment
    Non-standard automation equipment instead of manual operation has become the choice of more and more enterprises. If we redesign it completely according to the company's needs, the investment will be relatively large. Many customers will choose suitable non-standard automation solutions instead of expensive solutions. How to choose high-quality non-standard automated production line equipment requires more consideration.   1. Choose the equipment that suits your needs. In fact, different companies have different requirements for equipment. In many cases, the focus of non-standard equipment is to use equipment that is suitable for the existing working environment and existing working mode, rather than designed equipment, which requires efforts to change the working environment and mode.   2. Equipment quality problems. The quality of the equipment used in the equipment is very demanding. Therefore, the quality requirements for pneumatic components, guide components, circuit components, control systems, mechanical devices, etc. are very high. The reliability, safety and stability of the equipment are required to complete the required process and equipment production.   3. Attention should be paid to the scalability and variability of the equipment. After all, according to the current development speed, the development of the non-standard automation equipment industry will become faster and faster. In addition to the production requirements, it is necessary to require the equipment to add or delete certain functions according to its own needs, and to have new requirements in the future and be able to continue to use instead of redesigning and manufacturing.   4. Maintenance and after-sales service of automation equipment. Generally good automation equipment has been repeatedly tested before the formal purchase, and the performance indicators of the equipment have been debugged to a good state, and related training services are provided to ensure that the company can start in time after the purchase. On the other hand, after-sales service is required to ensure that follow-up problems are resolved in a timely manner.   5. The price of the equipment. The equipment purchased is not the cheapest, nor the most expensive, but the most suitable. Good automation equipment can solve the customer's production problems for the customer's production line itself, and the equipment supplier can provide customers with the best after-sales service, and can solve the problems encountered in the customer's production line in time. Only equipment with these conditions is the best and most cost-effective equipment.   XIAMEN FRAND Automation Equipment Co., Ltd. is a high-tech enterprise specializing in the research and development, manufacturing and sales of non-standard automation equipment for the automatic processing, assembly, assembly and testing of spare parts. Has a high-tech team engaged in the development and production of non-standard automation equipment for many years, adhering to the business philosophy of pragmatism, innovation, development, and harmony, from design and development, manufacturing to after-sales service, with professional technology, reliable quality, and considerate service It is our promise to customers. We have always worked hard to meet the different needs of users, and creating value for customers is our eternal pursuit.    

    detials

  • How to reduce the degree of wear and tear of non-standard automation equipment in daily use
    2025 - 09 - 26 How to reduce the degree of wear and tear of non-standard automation equipment in daily use
    The non-standard automation equipment smoothing agent is worn between the friction surfaces, due to the wear of hard particles, the rust of the surface, and the welding and tearing between the metal surfaces. Therefore, by supplying enough smoothing agent to the friction surface, good smoothing conditions can be formed, preventing the destruction of the oil film, maintaining the matching accuracy of the parts, and greatly reducing wear.1. Avoid corrosion and maintain the appearance of metal:Automation equipmentThe mechanical appearance of non-standard automation equipment must inevitably come into contact with surrounding media (such as air, moisture, water vapor, corrosive gas and liquid, etc.) to cause rust, corrosion and damage to the metal surface of the machine. In particular, the low-temperature vehicles in metallurgical plants and the corrosion and wear of chemical plants are more serious.Smooth oil or grease has no corrosive effect on metals, and can isolate the moisture in the humid air and the corrosion of harmless media. We apply a layer of oil or grease with anti-corrosion and anti-rust additives on the metal surface of the machine, which can play the role of anti-corrosion, anti-rust and maintenance of the metal surface.2. Lower the temperature:Non-standard automation equipment smoothing agent can reduce the coefficient of friction and reduce the occurrence of frictional heat. The work done by the machine we operate to restrain friction is all converted into heat, partly dispersed from the body, and partly lowered the temperature of the machine from time to time. The concentrated circulation of liquid smoothing agent can take away the heat generated by friction, and play a role in cooling, so that the machine can be controlled to operate within the required temperature range.

    detials

  • Reasons for long cost recovery period of non-standard automation equipment
    2025 - 09 - 27 Reasons for long cost recovery period of non-standard automation equipment
    Nowadays, many products have some special requirements during production. Some general-purpose equipment cannot meet the requirements of these products. In order to improve production efficiency, non-standard automation equipment can achieve these special requirements according to actual production needs. Now many companies produce products. At that time, the proportion of non-standard automation equipment is also increasing.The cost of non-standard automation equipment is relatively high, and it takes a long time to see the effect. However, because the profits obtained are relatively high, and the research value is relatively high, many manufacturers use this type of equipment.The main reasons why the recycling cycle of non-standard automation equipment is so long are as follows:1. The investment cost of automation non-standard equipment is relatively highThere are manpower investment, time investment and other material costs, manufacturing and scientific research costs, and so on.2. A relatively high level of technology is requiredIt is difficult to design machines for some products, and certain technical capabilities are required. Some materials also stipulate specificity. However, if parts of the equipment are to be changed, the materials used will also change, which will increase the production cost.3. The stability of the equipment is subject to the actual application of the productA complete equipment starts from R&D and manufacturing to its later successful assembly. In this process, it will definitely encounter many difficulties. It must be used in practice to ensure that the equipment can operate stably and reliably.Therefore, the cost of non-standard automation equipment must be invested before it can be profitable. However, sometimes there will be a lot of investment, and the return is not very high, because the cost of the later assembly and manufacturing of the equipment is difficult to recover in the short term. At this time, the various industries in the enterprise should be allowed to develop complementary, so that the follow-up industries can continue to develop.

    detials

  • The development prospect of automation industry
    2025 - 09 - 28 The development prospect of automation industry
    The globalization of economy has intensified the market competition, and the intelligent, flexible and unmanned manufacturing industry has become a development trend, and the industrial automation industry has gained a broad space for development. In recent years, Germany has put forward the "Industry 4.0" plan, the United States has put forward the "National Manufacturing Innovation Network", Japan has put forward the "Innovative Industrial Structure Plan", and China has also put forward the "Made in China 2025" development plan. Their common ground is to make full use of the Internet of things, 5G communications, robots, artificial intelligence and other technical means to improve the intelligent and unmanned degree of manufacturing. Industrial automation products are an important premise and guarantee for modern factories to achieve scale, high efficiency, precision, intelligence and safe production. They are widely used and have a good development prospect. According to the Research data of Zion Market Research, the global industrial automation Market has reached 207.17 billion dollars in 2017. Due to the gradual maturity and commercial application of the Internet of Things, 5G technology and artificial intelligence technology, The global industrial automation market is expected to reach us $321.93 billion by 2024, with a compound annual growth rate of about 6.5%. The market for industrial automation services reached $42.1 billion in 2018 And is expected to reach $70.6 billion by 2024, with a compound annual growth rate of about 9%, according to Research And Markets. At present, the world's major industrial automation industry manufacturers include ABB, Siemens, General Electric, Schneider, Yaskawa, FANUC, Mitsubishi, Fuji Electric and so on. As an important part of high-end equipment, industrial automation control system is an important prerequisite and guarantee for modern industrial production to achieve scale, efficiency, precision, intelligence and safety.

    detials

1 2 3 4 5

A total of5pages

leave a message

leave a message
If you are interested in our products and want to know more details,please leave a message here,we will reply you as soon as we can.

Home

Products

whatsApp