Automatic Assembly Machine
News
  • How to properly install and remove the pre-opening spring clamp?
    2025 - 09 - 17 How to properly install and remove the pre-opening spring clamp?
    The steps to install the pre-opening spring clamp are as follows:   1. ** Preparation ** : Select the appropriate size and type of pre-opening spring clamp, and ensure that its surface is smooth and non-damaging. In addition, prepare required tools, such as screwdrivers and wrenches.   2. ** Clean the installation part ** : Clean the part where the clamp needs to be installed and ensure that the surface is free of oil, dust and impurities.   3. ** Install the clamp ** : Align the opening of the pre-opened spring clamp with the installation part, and then tighten the screw or nut of the clamp with a screwdriver or wrench until the clamp is firmly fixed on the installation part.   4. ** Check the installation effect ** : After the installation is completed, check whether the clamp is firm, whether there is loosening or deformation. If the problem is found, it should be adjusted or replaced in time.   The steps to remove the pre-opened spring clamp are as follows:   1. ** Preparation ** : Select the appropriate size and type of removal tools, such as clamp pliers, screwdrivers, etc. At the same time, ensure that the surface of the disassembly tool is smooth and free of damage.   2. ** Loosen the clamp ** : Loosen the screw or nut of the pre-opened spring clamp with the clamp pliers or screwdriver until the opening of the clamp becomes larger.   3. ** Remove the clamp ** : Align the opening of the clamp with the installation part, and then remove the clamp from the installation part by hand or tool.   4. ** Check the disassembly effect ** : After the disassembly is completed, check whether the installation part is damaged or deformed. If the problem is found, it should be repaired or replaced in time. It should be noted that when installing and removing the pre-opened spring clamp, the relevant safety specifications and operating procedures should be followed to ensure the safety of the operator. At the same time, the appropriate installation and disassembly method should be selected according to the actual situation to ensure the installation and disassembly effect of the clamp.  

    detials

  • A Comprehensive Guide to Using Heavy-Duty Clamps
    2025 - 09 - 24 A Comprehensive Guide to Using Heavy-Duty Clamps
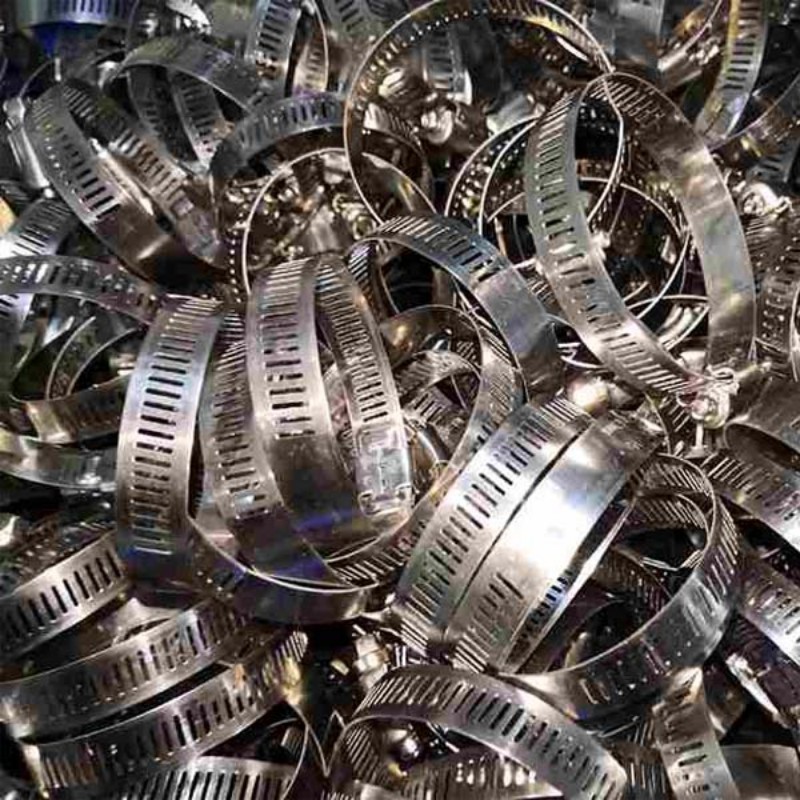
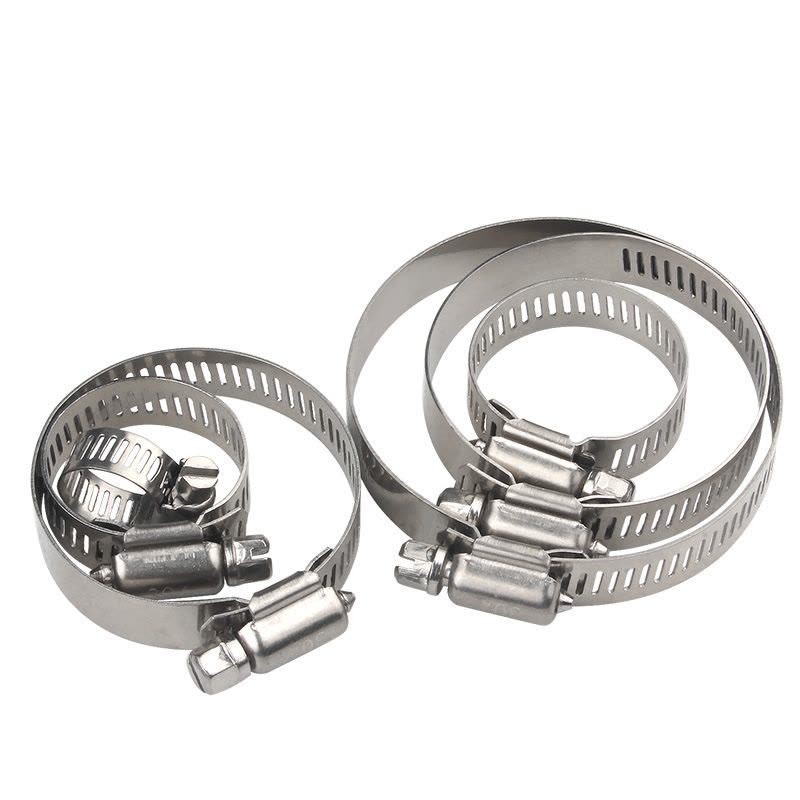
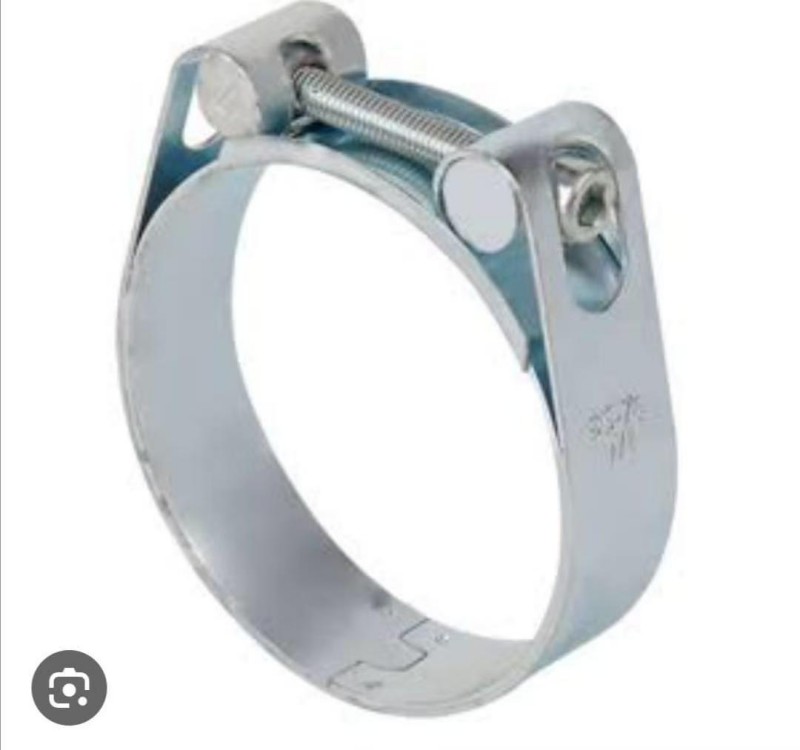
    Heavy-duty clamps are commonly used fastening accessories in pipe connections, widely applied in water pipes, gas pipes, oil pipes, and various other pipe systems. Their core function is to ensure a tight seal at pipe interfaces through high-intensity clamping force. Correct use of heavy-duty clamps not only extends the service life of the pipe system but also prevents safety hazards such as leakage and detachment caused by improper tightening. The following are detailed usage steps, precautions, and solutions to common problems. I. Preparations Before Use: Tools and Inspection Are Both Essential Before starting the operation, it is necessary to prepare the tools and inspect the clamps and pipes. This is the foundation for ensuring the installation effect. List of Essential Tools 
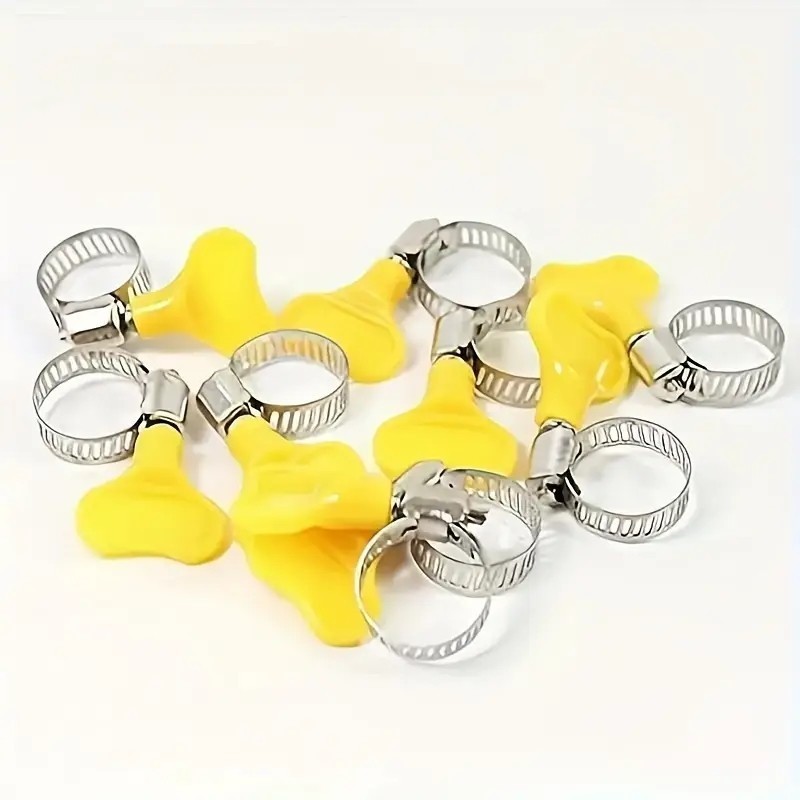
Basic Tools: Select the corresponding tools based on the type of clamp, such as a flat-head screwdriver, a Phillips screwdriver (for screw-type clamps), an adjustable wrench, and a socket wrench (for bolt-type clamps); for quick-release clamps, they can be operated directly by hand without additional tools. Auxiliary Tools: A tape measure (to measure the pipe diameter and confirm if the clamp size is compatible), a cotton cloth (to clean the pipe interface surface), and gloves (to protect the hands from being scratched by pipe burrs or clamp edges during installation). Key Inspection Steps Check the clamp: Ensure there is no deformation, cracks, rust, or other damage to the clamp, and that the screws/bolts are not stripped. If there is a gasket (if applicable), check that it is not aged or damaged. Ensure the structure is intact and meets strength requirements. Check the pipe: Clean the oil, dust, and burrs at the pipe interface to ensure the surface is smooth. If it is a new pipe, confirm that the interface size matches the clamp specification (the inner diameter of the clamp should be slightly smaller than the outer diameter of the pipe, typically with a difference of 1-3mm to ensure sufficient sealing force after clamping). II. Core Operation Steps: Four Steps to Secure Installation The installation of heavy-duty clamps follows the process of "positioning - clamping - pre-tightening - tightening". During the operation, control the force to avoid over-tightening and damaging the pipe or clamp. Step 1: Determine the Installation Position 
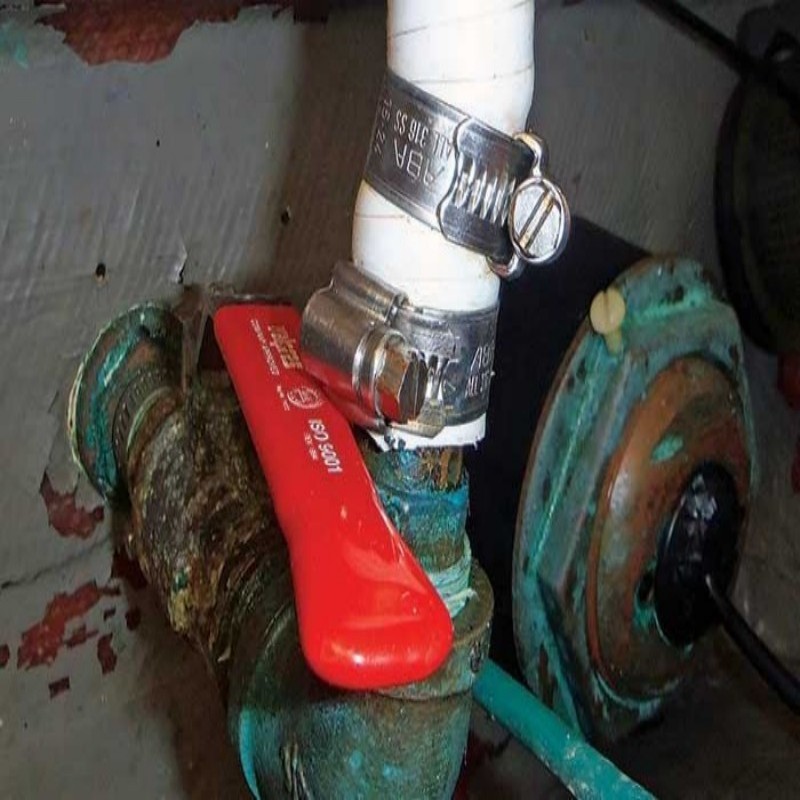
Align the two pipes to be connected and ensure the interfaces are fully in contact (if connecting a flexible pipe to a rigid pipe, insert the flexible pipe into the rigid pipe interface by at least 2-3cm to avoid detachment due to only covering the edge of the interface). Mark the clamp installation position: The clamp should be placed in the middle of the pipe interface, not at the edge, to ensure the clamping force is evenly distributed over the interface. If multiple clamps are needed (for large-diameter pipes), the recommended spacing between adjacent clamps is 5-10cm, and they should be symmetrically distributed. Step 2: Insert the Heavy-Duty Clamp 
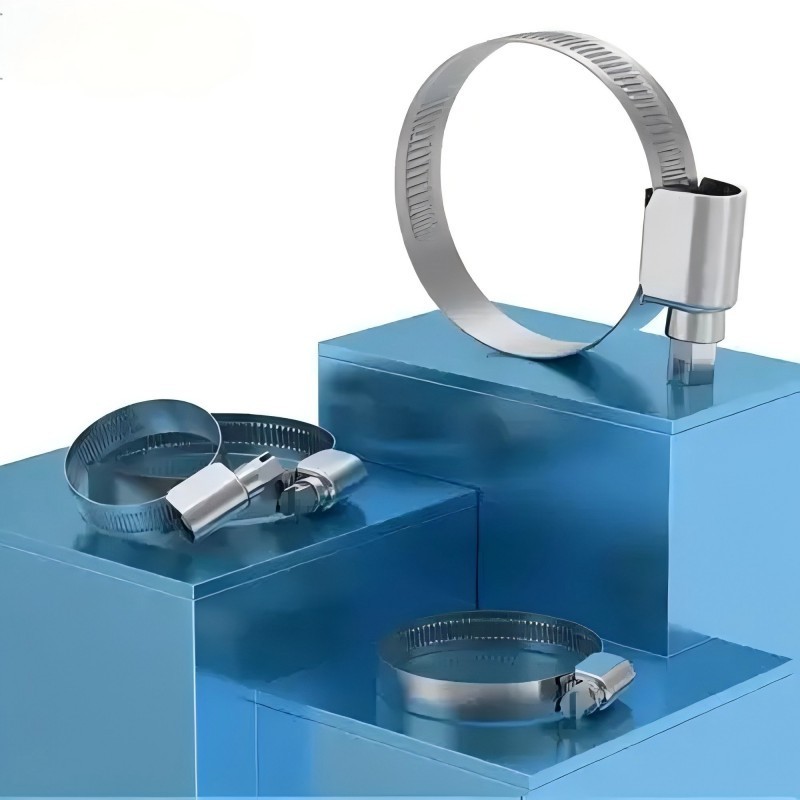
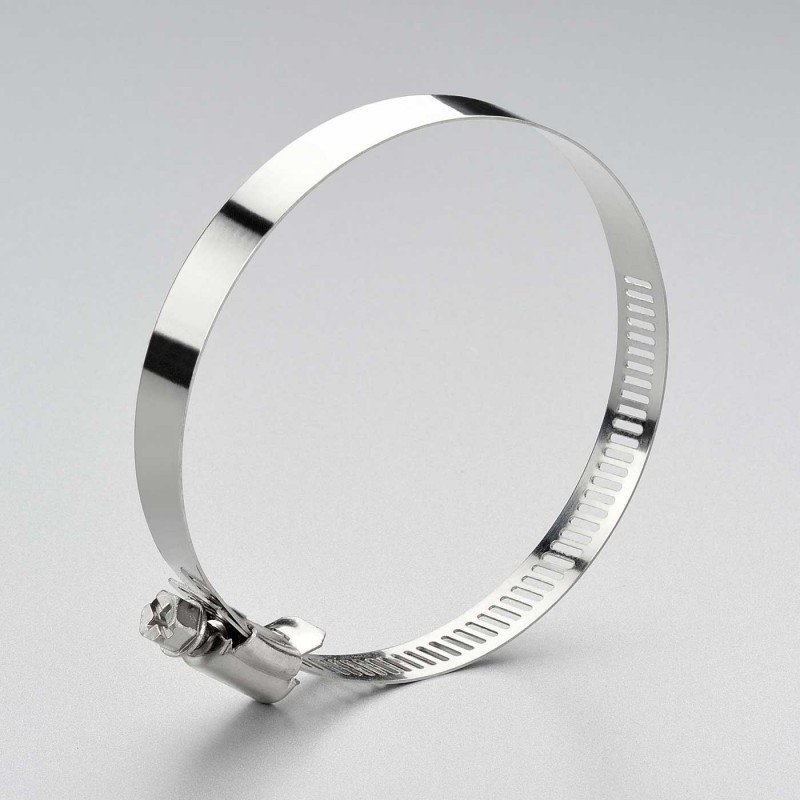
Loosen the screws/bolts of the clamp, spread the open end of the clamp, and slowly place it over the marked pipe interface. Ensure the clamp's steel band/clamp body fully wraps around the pipe without any offset or distortion. If the clamp has a gasket (such as a rubber gasket), confirm that it is tightly against the pipe surface without any wrinkles. The gasket's role is to enhance the seal and prevent wear on the pipe from direct contact with the metal clamp. Step 3: Pre-tighten and Fix Use your hand to turn the screws/bolts of the clamp or use a tool to gently rotate it, initially tightening the clamp until the clamp body is in contact with the pipe surface. At this point, the pipe should not be loose but still allow for slight adjustment (avoid excessive force during the pre-tightening stage to prevent inability to adjust later). Adjust the pipe and clamp: Confirm that the pipe interface is not misaligned and the clamp position is accurate before proceeding to the next step of tightening. If the pipe is misaligned, release the pre-tightening force, realign, and pre-tighten again. Step 4: Final Tightening (Critical Step) Select the appropriate tool: Use a screwdriver of the corresponding size for screw-type clamps and a wrench for bolt-type clamps. Apply force perpendicular to the screws/bolts and slowly turn the tool to gradually tighten the clamp. Control the tightening force: This is the core to avoid damage - observe the changes in the pipeline during tightening. When the surface of the pipeline shows slight deformation (such as a slight indentation on the hose), or when the tool feels significant resistance, stop. Different materials require different forces: plastic pipelines need to be tightened gently to avoid cracking; metal pipelines can be tightened more firmly, but avoid deforming the steel band of the clamp. Check the seal: After tightening, shake the pipeline by hand to ensure it is not loose. If conditions permit, apply soapy water to the connection and observe for bubbles (if there are bubbles, it indicates a leak and the clamp or pipeline needs to be re-tightened or inspected for damage). III. Precautions for Use: Avoid Common Mistakes to Ensure Safety and Durability Matching specifications is the prerequisite Never use clamps of incorrect size: If the inner diameter of the clamp is too large, it won't hold the pipeline tightly, causing leakage; if it's too small, forcing it on will deform the clamp or damage the pipeline. When purchasing, clearly identify the outer diameter of the pipeline and choose the corresponding size of the clamp (for example, if the pipeline's outer diameter is 25mm, select a clamp with an inner diameter of 22-25mm). Material compatibility for corrosion resistance Choose the material of the clamp based on the usage environment: For corrosive environments such as water, acids, and alkalis, use stainless steel clamps (such as 304 stainless steel) to avoid rust and failure of ordinary carbon steel clamps; for high-temperature environments (such as engine pipelines), use high-temperature resistant steel band clamps to prevent the clamp from aging due to high temperatures. Avoid over-tightening Over-tightening is the most common mistake: it can cause the pipeline (especially plastic and rubber pipes) to crack or deform, and in severe cases, it can cause the clamp screws to strip or the steel band to break, losing its tightening effect. Follow the principle of "stop when significant resistance is felt" during tightening; there is no need to tighten to the maximum. Regular inspection and maintenance Regular checks are necessary after installation: especially in scenarios with significant vibration (such as mechanical equipment pipelines), check the tightness of the clamps weekly and confirm the seal every three months. If rust is found on the clamp, the screws are stripped, or there is a leak in the pipeline, replace the clamp promptly to prevent accidents. IV. Common Problems and Solutions Q&A Possible Causes Solutions Leakage at pipe connection 1. The clamp is not tightened properly; 2. The size of the clamp does not match; 3. The pipe connection is damaged 1. Retighten the clamp. If leakage persists, check if the size matches; 2. Replace with a clamp of the correct size; 3. Repair or replace the damaged pipe Loose or stripped clamp screws 1. The tool used is not the right size, causing the screw to break; 2. Over-tightening, causing excessive force on the screw 1. Use the correct tool. If the screw is stripped, replace the entire clamp; 2. Follow the correct tightening force and avoid excessive force Soft hose crushed by the clamp 1. The clamp material is too hard (e.g., metal clamps used directly on thin-walled hoses); 2. Excessive tightening force 1. Replace with a clamp with a rubber liner or place a soft cloth between the clamp and the hose; 2. Reduce the tightening force to the point where there is no leakage and the pipe is not loose Rusty and ineffective clamp 1. The clamp material is not corrosion-resistant (e.g., carbon steel used in a humid environment); 2. Long-term lack of maintenance 1. Replace with a corrosion-resistant clamp such as stainless steel; 2. Regularly clean the clamp and apply anti-rust agent to metal parts (non-sealing surfaces)

    detials

  • Quick Release Hose Clamp
    2025 - 09 - 06 Quick Release Hose Clamp
    Featuring a secure catch that can be locked and opened easily, the quick release hose clamp is typically used for some light-duty clamping jobs, as on the air outlet of the central air conditioning system.     FRAND provide reliable ODM/OEM and win-win service from the project start to optimize the technology designing positioning on the production efficiency improved &production cost saved by friendly Man-Machine interface, easy operation& flexible changeover as well as the smaller footprint to realize product value-added of assembly automation.     #assemblymachine #clampassemblymachina #assemblysolution  

    detials

  • Three common mistakes in installing Hose Clamp
    2025 - 09 - 22 Three common mistakes in installing Hose Clamp
    The three common mistakes when installing the hose band mainly include the following points:   First, the hose clamp installation position is wrong Problem description: The installation position of the hose strap deviates from the correct installation area, resulting in the hose strap is not fully covered. Potential consequences: Because the hose band does not cover the hose correctly, the hose band is easy to fall off after a long time of work, especially in the presence of vibration environment. This can lead to a loose seal, which can lead to liquid or gas leaks. 2. Inclined installation of throat hoop Description of the problem: The throat band does not maintain a horizontal or vertical state during installation, but presents a tilted state.   Potential consequences:   The inclined throat band may cause the edge of the band to cut the hose, reducing the strength and sealing performance of the hose. In the case of vibration or pressure changes, the inclined throat band is more likely to loosen or fall off. Uneven stress points may lead to excessive pressure on the hose band at a specific location, which accelerates wear and damage. Third, the tube is not inserted in place Problem description: The connection between the hose and the hard pipe is not tight, and the pipe is not inserted in place.   Potential consequences:   The tube is not inserted in place, which means that the throat band needs to rely on greater tightening force to maintain the seal. However, when the pipe is subjected to external forces (such as rocking, shaking), this fastening force may be destroyed, causing the throat band to fall off. Improperly inserted tubes can also result in a loose seal, which can cause leaks. Suggestions for correct installation of hose straps Ensure correct placement: Before installing the hose strap, carefully check the installation area to ensure that the hose strap fully covers the hose and is located in the manufacturer's recommended installation location. Maintain horizontal or vertical installation: When installing the hose band, ensure that the band is kept horizontal or vertical and avoid inclined installation. This helps ensure uniform force on the hose band and reduces the risk of cutting the hose. Pipe in place: When connecting a hose to a hard pipe, make sure the pipe is in place and snug to the hard pipe. This helps to enhance the sealing performance and reduces the risk of the throat band falling off. In summary, the correct installation method and precautions are crucial to ensure the normal use and sealing performance of the hose hoop. When installing the hose band, be sure to follow the manufacturer's instructions and recommendations, and carefully check each installation step to ensure the correctness and reliability of the installation.  

    detials

  • Hose Clamp With Handle (with Non-Perforated Band)
    2025 - 09 - 07 Hose Clamp With Handle (with Non-Perforated Band)
    Reusable and easy to take on and off, this turn-key hose clamp is suitable for various clamping jobs and installs with an easy hand twist of the black or yellow turn handle. The turn key can be stainless steel or plastic. No tools required for installation.   FRAND provide reliable ODM/OEM and win-win service from the project start to optimize the technology designing positioning on the production efficiency improved & production cost saved by friendly Man-Machine interface, easy operation & flexible changeover as well as the smaller footprint to realize product value-added of assembly automation.   #assemblymachine #clampassemblymachina #assemblysolution

    detials

  • The application of DIN 3016 hose clamps in the construction and HVAC industries
    2025 - 09 - 22 The application of DIN 3016 hose clamps in the construction and HVAC industries
    DIN 3016 hose clamps are widely used in the construction and HVAC industries due to their versatility and reliability. These clamps are designed to secure and hold various pipes, ducts, and cable assemblies. In construction, they provide necessary support for infrastructure components; while in HVAC systems, they ensure the proper positioning of ducts and pipes. They perform well in both applications.   Benefits of Using DIN 3016 Hose Clamps in Construction There are many benefits to using DIN 3016 hose clamps in construction projects. Firstly, these clamps offer strong support, helping to maintain the stability of installed materials. Additionally, they are easy to install, saving assembly time. Moreover, their adjustable design makes them compatible with different diameter hose clamps, suitable for various applications. In summary, these clamps can enhance construction efficiency and reliability.   Durability and Corrosion Resistance Advantages DIN 3016 clamps have significant advantages in terms of durability and corrosion resistance. These clamps are made of high-quality materials and can withstand harsh environmental conditions. This durability ensures their long-term functionality. Moreover, clamps with corrosion-resistant coatings are ideal for projects exposed to moisture or corrosive substances. Therefore, they reduce the need for frequent replacements, saving time and costs.   Common Construction Applications of DIN 3016 Hose Clamps DIN 3016 clamps are frequently used in various construction applications. One of their main uses is to secure pipes. Additionally, they can effectively fix pipe systems and support electrical conduits. These clamps can also effectively manage cables on construction sites, preventing tangling and ensuring orderly installation. Their versatility makes them an essential tool on any construction site.   Supporting Electrical Conduits and Cable Management Supporting electrical conduits and managing cables are important applications of DIN 3016 hose clamps. By firmly fixing electrical conduits, these clamps help prevent any movement or displacement during construction. This ensures that the electrical system remains intact and functions properly. Additionally, by organizing and fixing cables, the clamps can reduce the risk of accidents. Proper cable management also facilitates connections and enhances on-site safety.   The Role of DIN 3016 Hose Clamps in HVAC Systems In HVAC systems, DIN 3016 hose clamps play a crucial role. These clamps are essential for securing pipes, ducts, and other components in place. By ensuring proper connection of components, they help the system operate efficiently. Moreover, these clamps prevent pipes from sagging or disconnecting, thereby maintaining necessary airflow. Their importance in achieving optimal HVAC performance is undeniable.   Specialized HVAC Applications of DIN 3016 Clamps DIN 3016 clamps are suitable for professional HVAC applications. For example, they can be used to secure refrigerant lines, ensuring efficient operation of cooling systems. Additionally, these clamps can stabilize ventilation ducts, which is crucial for maintaining uniform airflow. In exhaust systems, they can prevent any loosening of components that could lead to efficiency losses. Their adaptability to different HVAC components makes them a valuable tool in any HVAC installation.   Best Practices for DIN 3016 Hose Clamps Proper installation of DIN 3016 hose clamps is crucial for achieving optimal performance. Firstly, ensure that all components are correctly aligned before tightening the clamps. This alignment helps prevent excessive pressure on the fixed objects. In addition, using the appropriate tools for installation is also crucial to avoid damaging the hose clamps or materials. Regularly inspecting the hose clamps after installation helps maintain their effectiveness and ensure long-term stability. Steps to Ensure Correct Installation Ensuring the correct installation of DIN 3016 hose clamps involves several key steps. First, select the appropriate size of the hose clamp based on the application to ensure a tight fit. Next, evenly place the hose clamp around the object to be fixed to distribute the pressure evenly. After installing the hose clamp, tighten it fully but not excessively, as over-tightening may damage the material. Finally, checking the fit of the hose clamp after installation helps confirm that all components are securely and stably in place. Material Selection and Its Impact on Performance Choosing the right material for DIN 3016 hose clamps significantly affects their performance. Stainless steel hose clamps offer high strength and corrosion resistance, making them ideal for harsh environments. On the other hand, galvanized steel hose clamps provide a more cost-effective solution for less severe conditions. Additionally, for light applications where corrosion is not a concern, plastic hose clamps may be a better choice. Understanding these options helps make informed decisions for each project. Stainless Steel for Corrosive Environments Stainless steel clamps are the ideal choice for corrosive environments. This material has excellent anti-rust properties and can effectively resist corrosion caused by chemicals or moisture. Therefore, even in harsh conditions, stainless steel clamps can maintain their integrity and performance. In the long run, using these clamps can reduce the risk of failure and costly replacements. Therefore, we strongly recommend them for industrial applications and environments with high stress. Rubber-Lined Noise-Reducing Hose Clamps Rubber-lined clamps are an excellent solution for noise reduction in various applications. The rubber lining acts as a buffer, minimizing the transmission of vibrations between pipes or ducts and their supports. This feature not only reduces noise but also prevents long-term material wear. Moreover, these clamps provide additional protection for delicate surfaces, ensuring a flawless installation. They are particularly suitable for HVAC and piping systems where noise control is necessary. How to Choose the Right DIN 3016 Hose Clamp? Choosing the right DIN 3016 hose clamp requires considering several important factors. First, assess the application to determine the appropriate size and type of hose clamp needed. Selecting the right material based on environmental conditions also affects performance. Additionally, consider any features that may facilitate installation, such as rubber linings for protection or insulation. Taking the time to evaluate these factors ensures the best functionality and lifespan of the hose clamps in the project. Factors to Consider When Choosing a Hose Clamp When choosing a hose clamp, keep the following factors in mind: - Application type: Determine where the hose clamp will be used. - Hose clamp size: Measure the diameter of the object to be fixed. - Material selection: Choose based on environmental exposure. - Insulation requirements: Consider using insulated hose clamps for added protection. Installation conditions: Evaluate whether special features are needed for easier installation.

    detials

  • British Style Hose Clamp (with Riveted Housing)
    2025 - 09 - 08 British Style Hose Clamp (with Riveted Housing)
    It is easy to distinguish this British style hose clamp from its peers by the riveted housing. The internal surface of the steel band is smooth without perforations or raised spots that might scratch the hose. The housing comes in a tubular design, and screw and the loose end of steel band runs through it. There is a backstop positioned at some point to secure the screw in its position where it is supposed to.   FRAND provide reliable ODM/OEM and win-win service from the project start to optimize the technology designing positioning on the production efficiency improved & production cost saved by friendly Man-Machine interface, easy operation & flexible changeover as well as the smaller footprint to realize product value-added of assembly automation.   #assemblymachine #clampassemblymachina #assemblysolution

    detials

  • Stainless steel clamp function
    2025 - 09 - 20 Stainless steel clamp function
    Stainless steel clamp plays a vital role in the pipeline system, its main role includes the following aspects:   First, pipeline connection Stainless steel clamps can firmly connect the two pipes together to ensure the continuity and integrity of the pipeline system. This connection is not only simple and fast, but also has a high connection strength and can withstand a certain amount of pipeline pressure and tension.   Two, pipeline fixed In the pipeline system, stainless steel clamps can be used to fix the pipeline to prevent the pipeline from shaking or shifting due to external force. Especially in some complex or special pipeline layouts, the fixing role of stainless steel clamps is particularly important, which helps to ensure the stability and safety of the pipeline system.   Three, pipeline sealing Through its unique clamping structure, the stainless steel clamp can effectively seal the pipe connection and prevent fluid leakage. This sealing performance is crucial in liquid or gas transmission systems, helping to avoid resource waste and environmental pollution.   4. Withstand stress The stainless steel clamp has a high pressure capacity and can withstand the operation requirements of the pipeline system in a high pressure environment. This pressure bearing capacity ensures the stability and safety of the pipeline system under high pressure conditions.   5. Strong adaptability The material and structural design of the stainless steel clamp enable it to adapt to a variety of different working environments and media requirements. For example, in the chemical, petroleum, paper, food, medicine and other industries, stainless steel clamp because of its corrosion resistance, high temperature resistance and other characteristics are widely used.   6. Easy installation The installation process of stainless steel clamps is relatively simple and does not require complex tools and techniques. This helps to reduce installation costs and time and improve work efficiency. At the same time, the removal of the stainless steel clamp is also relatively easy, which is easy to maintain and replace the pipeline.   In summary, stainless steel clamps have a variety of important roles in the pipeline system, including pipeline connection, fixing, sealing, pressure resistance, strong adaptability and easy installation. These functions together ensure the normal operation and safety of the pipeline system.  

    detials

  • British Style Hose Clamp (with Welded Housing)
    2025 - 09 - 09 British Style Hose Clamp (with Welded Housing)
    A smooth internal surface of this British style hose clamp does not snag the hose. The tubular housing receives the screw and the loose end of the steel band. A backstop is used to hold the screw in place. Spot-welded housing holds up well under pressure.   FRAND provide reliable ODM/OEM and win-win service from the project start to optimize the technology designing positioning on the production efficiency improved & production cost saved by friendly Man-Machine interface, easy operation & flexible changeover as well as the smaller footprint to realize product value-added of assembly automation.   #assemblymachine #clampassemblymachina #assemblysolution

    detials

  • Stainless steel clamp fastening tutorial
    2025 - 09 - 19 Stainless steel clamp fastening tutorial
    The fastening process of stainless steel clamps needs to follow certain steps and precautions, the following is a detailed fastening tutorial:   1. Prepare tools and materials Select the right stainless steel clamps: Select the right size and type of stainless steel clamps according to the diameter of the pipe and the required pressure level. Prepare necessary tools: including clamp pliers (not common cable tie pliers on the market, need to choose durable, non-deforming material, such as No. 55 steel), torque wrench (used to evenly tighten bolts, avoid excessive tightening caused by deformation), etc. Second, installation steps Check pipes and clamps: Ensure that the pipe surface is clean and free from damage, and the clamps are free from corrosion, deformation and other defects. Insert clamp: Put stainless steel clamp on the pipe, ensuring that the opening direction of the clamp is consistent with the axial direction of the pipe. At the same time, the inner diameter of the clamp before clamping should be slightly larger than the outer diameter of the pipe, so that it can be easily inserted. Preliminary positioning: Preliminarily fix the ear of the clamp on the pipe by hand to ensure that the clamp fits closely with the pipe. Clamp with a clamp clamp: Align the jaws of the clamp clamp with the root of the clamp ear and clamp the clamp in one step. Be careful not to apply pressure twice, and the two sides of the ear should not touch together after clamping. Since the single-ear clamp is clamped using the plastic deformation of the metal, it is necessary to pay attention to the moderate deformation when clamping, neither too small to cause insufficient clamping force, nor too large to cause damage to the clamp. Check the fastening condition: After clamping, the fastening condition of the clamp can be initially judged by naked eye observation and hand pushing. If necessary, a torque wrench can be used to further tighten the bolt to ensure that the clamp achieves the required tightening torque. Third, precautions Choose the right clamp clamp: be sure to choose good quality, wear-resistant clamp clamp, avoid the use of ordinary tools such as cable pliers on the market, so as not to damage the clamp or affect the fastening effect. Avoid secondary pressure: When clamping the clamp, it should be in place in one step to avoid deformation or damage of the clamp caused by multiple pressures. Uniform fastening: If the stainless steel clamp connected by bolts is used, a torque wrench should be used to tighten the bolts evenly to avoid deformation or damage caused by excessive tightening. Regular inspection: After the installation is completed, the fastening of the clamp should be checked regularly, and if it is loose, it should be tightened in time to ensure the safe operation of the pipeline system. Following the above tutorial and precautions can ensure the proper installation and fastening of stainless steel clamps, thereby improving the stability and safety of the piping system.

    detials

  • Why should manganese steel spring clamp be used for the connection of automobile original pipeline?
    2025 - 09 - 18 Why should manganese steel spring clamp be used for the connection of automobile original pipeline?
    The spring clamp made of manganese steel is used for the connection of the original automobile pipeline, mainly for the following reasons:   First, the characteristics of manganese steel High strength: Manganese steel is an iron alloy, mainly composed of iron, manganese, carbon and other elements, with high strength, can withstand greater pressure and tension, so as to ensure the stability of the pipeline connection. High wear resistance: Manganese steel has good wear resistance and can maintain good performance during long-term use, reducing the risk of connection loosening or failure caused by wear. Good toughness: Manganese steel has good toughness and is not easy to deform or break when impacted or squeezed, thus ensuring the safety of pipeline connections. Second, the advantages of spring clamps Elastic deformation: The spring clamp strengthens the pipe connection through the elastic deformation of the spring, so that it is not easy to slide and deformation. This elastic deformation can adapt to the small deformation caused by temperature changes, vibration and other factors during the use of the pipeline, so as to maintain the stability of the connection. Sealing performance: The spring clamp can tightly wrap the hose during installation and fix the hose in the desired position through the spring's elasticity. At the same time, there is usually a gasket made of elastic material inside the clamp, which can play the role of buffering and sealing when the clamp is tightened to prevent liquid or gas leakage. Easy installation and maintenance: The spring clamp is relatively easy to install and remove, and does not require complex tools or equipment. At the same time, because of its good reusability, it is also more convenient in maintenance and replacement. Third, to meet the needs of automotive pipeline connection Withstand complex conditions: The car will experience a variety of complex conditions during use, such as high-speed driving, sudden braking, bumps and so on. The spring clamp made of manganese steel can withstand various forces and vibrations generated under these working conditions to ensure the stability and safety of the pipeline connection. Adapt to temperature changes: The car will generate a lot of heat during use, resulting in an increase in the temperature of the pipeline and its connectors. Manganese steel material has high temperature resistance, can maintain good performance in high temperature environment, so as to ensure the reliability of pipeline connection. Ensure vehicle performance: automotive pipeline connection is an important part of the automotive hydraulic or pneumatic system, and its stability and reliability are directly related to the overall performance of the car. The spring clamp made of manganese steel can provide a solid connection and reliable sealing performance, thus ensuring the normal operation of the hydraulic or pneumatic system of the automobile. To sum up, the spring clamp made of manganese steel is used for the connection of the original automobile pipeline because of its high strength, high wear resistance, good toughness and its own advantages, so as to meet the needs of the automobile pipeline connection in complex working conditions.

    detials

  • Single ear endless clamp installation tutorial
    2025 - 09 - 16 Single ear endless clamp installation tutorial
    The single-ear endless clamp, also known as the single-ear clamp, has no protrusion and gap in the inner ring, which can achieve uniform compression on the surface of the pipe fitting and provide 360° sealing protection. The following is the installation of the single ear endless clamp tutorial:   1. Preparation of tools and raw materials Single-ear endless clamp: Select the appropriate size and ensure that the inner diameter of the clamp before clamping is slightly larger than the outer diameter of the hose. Hose: Make sure the outer diameter of the hose matches the inner diameter of the clamp. Clamp clamp: Select manual or pneumatic clamp clamp depending on the number of installations. Manual clamp clamp is suitable for a small number of assembly cases, pneumatic clamp clamp is suitable for mass production or assembly number of large cases. Fittings (if required) : Ensure compatibility of fittings with hose and clamp. Second, installation steps Insert the clamp: Insert the single-ear endless clamp into the hose to ensure that the position of the clamp is correct, and the inner diameter of the clamp is slightly larger than the outer diameter of the hose, so that it can be clamped smoothly. Adjust the air pressure (such as using pneumatic clamp clamp) : Increase the air pressure of the air compressor to the appropriate range (such as 6 to 8 kg), ensure that the air pressure is not high or low, to avoid the loss of the clamp clamp accessories or affect the clamping effect. Select jaws: Select a clamp jaw set with the right jaws opening size. The opening size of the claw can not be too large, too large easy to press wrong; It should not be too small, otherwise it cannot be put into the ear of the clamp. Clamp clamp: Align the clamp mouth with the root of the clamp ear and clamp the clamp in one step. Be careful not to apply pressure twice, and the two sides of the ear should not touch together after clamping. After clamping, you can judge whether the clamp is in place by observation and hand pushing. Third, installation precautions Choose the right clamp clamp: It is recommended to choose the clamp clamp that matches the quality of the clamp to ensure the clamping effect and the service life of the clamp clamp. Avoid secondary pressure: When clamping the clamp, it should be in place at one time to avoid deformation or damage of the clamp caused by multiple pressures. Check the tightness: After installation, check the tightness between the clamp and the hose to ensure that there is no leakage. Pay attention to safe operation: When using pneumatic clamp clamp, pay attention to safe operation specifications to avoid accidents. Through the above steps and precautions, you can correctly install the single-ear endless clamp, and ensure that it has good sealing and stability.  

    detials

1 2 3 4 5 6

A total of6pages

leave a message

leave a message
If you are interested in our products and want to know more details,please leave a message here,we will reply you as soon as we can.

Home

Products

whatsApp